|
|
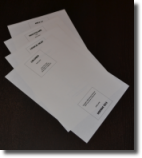
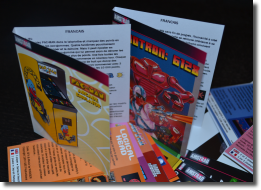
The archive of each game cover contains the following PDF files:
- The main visual (cover)
- The instruction manual using the same size to print on the back (Inlay)
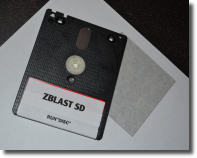
- The sticker for the floppy disk.
All elements were created to be printed on A4 size paper - 215x297 mm.
Choose the paper
You can choose to print on standard 80 g/m² paper. But if you have in your hands a box of official CF-2 AMSoft floppy disks,
the sheet inside shows that you can use a thicker paper without any problem. I would still tend to advise you against
exceeding 220 g/m², an already substantial thickness.
Then comes the choice of paper texture. A "glossy" paper offers an impressive and very professional rendering. But beware,
because the more it is glossy, the more it may break like glass when folded. Obviously the quality of paper is important.
You can also opt for a matte finish that will avoid this risk. In addition, a matte paper is less reflective and less
sensitive to scratches or fingerprints.
To print the instructions on the back of your cover, do not forget to make sure that the paper has no watermark on
the back. Users of laser printers must also verify that the paper is printable on both sides. Inlay do not contains any edge
to avoid problems if your printer impact a slight offset from the printing on the front.
To print your floppy disk labels, the easiest way is to use adhesive A4 sheets. You can simply print the label file of each game on a leaf.
|
|
Special paper for 3" and 3"½ floppy disks
You can also search for paper sheets specifically designed for floppy disks. Luck or magic of standardization,
3" and 3"½ disks share the same label dimensions.
However, nowadays, floppy disks have disappeared from stores. It is not so easy to dig up reams of disk label paper.
Here are some references to help you in your search: World Label WL-225 and Avery 5196 for U.S. letter size sheets,
Avery-Zweckform L4741REV for A4 sheets. There are certainly others.
Do not hesitate to contact me if you want to use floppy disk label paper. I could certainly prepare files suitable
if you provide me the correct template.
|
|
Print parameters
 Simply display the desired file and start printing. The PDF format ensures you have the original aspect ratio and size so that your covers fit
neatly into boxes. In terms of print quality visuals (covers), refer to your printer user manual to select the right settings.
I advise you to first print the instructions (Inlay) in order not to multiply the passages of paper in your printer once the visual printed. This
will prevent the print rollers from scratch a photo-quality printing.
To print your paper on the other side, simply return the sheet after the first printing done and insert it back into the paper tray of your printer,
making sure to observe the direction of insertion so that the instructions and visual are positioned in the same reading direction.
 NOTES: If your paper is not prepared for printing recto/verso, use a "standard" setting to print on back. In terms of quality, print quality
"superior/fine" can give better results, but you risk a unsightly "blotter" effect. Depending on your paper, also use a "standard" print quality. Users
of laser printers, you do not risk this problem. Be careful though because you may simply can not print on the back of a paper if it is not prepared
for this purpose.
To print floppy disk labels, you can use a "standard" quality print parameter since they are only composed of text. "Superior/fine" print quality
may, however, allow you to enjoy greater finesse in printing characters.
Cutting and assembling elements
You must have in your hands two sheets: one on which is printed the cover with the instructions overleaf and the second, adhesive, with the label.
 To cut these two elements, nothing like a good old iron measure and a cutter or a very sharp scalpel. The covers are without cut lines but this
should not be a problem for you to make an accurate cut due to the small size of the elements and the lack of use of white on the background
of visuals so that the edges always emerge distinctly.
To cut the label, make sure of a slight margin within the printing frame so that it is no longer visible once you finished.
 Folding the cover should be safely if your paper is not too thick. For covers with a visual using a black background that merges with that of
the edge, I advise you to simply mark the location of the folding on top and bottom of the cover and fold your paper before cutting. The width
of the slot is 5 mm.
 To apply the label on the floppy disk, just block it in the upper left or right corner of the space provided for this purpose on one side of your
3" disk leaving a slight margin at the top and on the side (one or two millimeters). Apply it then over the entire surface flipping it for perfect
centering.
The use of AMSoft floppy disks adds to the illusion of original games. If you can afford this luxury, do not hesitate. Guaranteed results!
Finally, just slide the cover and the disk in the box to give your favorite homebrew a typically AMSTRAD CPC crystal-box.
|
|